Posted in Gluten Free, Vegetarian

GF Blueberry Scones/w Sweet Almond Glaze

Ever since I can remember, I’ve always loved blueberries. When I was younger, I remember really disliking the large seeds in most other berries, but blueberries had this great flavor, with a mix of tart and oh-so-sweet, without too much of that crunchy seed action. As I matured of course, I grew to love all or at least most berries. I mean, what’s not to like? There’s such a variety of flavors, sizes, and seeds. And I, for one, love having variety….then again, who doesn’t?

IMG_0804 Edited #3

Anyways, back to my love of blueberries, they’re amazing, and can be put in such a wide array of baked goods, and dishes. My favorites being ones like, soft blueberry muffins for on the go, blueberry pancakes on Saturday morning, cold blueberry + banana smoothies to cool down on a hot summer day, and finally, scones. I love a good blueberry scone. Haha But, I tend to be rather picky when it comes to scones. You see, I often find scones to be rather dry. Which then leads to that awkward, this-won’t-go-down-my-throat…my-mouth-is-coated-in-scone…how-much-liquid-can-one-person-drink-while-eating-such-a-small-thing, situation. Which is not pretty, nor enjoyable. To me at least.

IMG_0813 Edited

Occasionally, I’ve stumbled on these scones that are more tender, but still maintained that slight crumb that makes a scone, a scone in my opinion (well, besides the obvious triangle shape, of course). What’s the secret to make them more tender and moist you ask? More cold butter. It’s as simple as that.  I swapped the traditional butter, with Earth Balance dairy-free butter, and you honestly could not tell the difference.

IMG_0731

I’ve recently been trying out a new gluten free flour blend, it’s a measure-for-measure from King Arthur Flour, and I absolutely love it. If you bake gluten-free much, and are looking for a more accessible flour mixture (so you don’t have to deal with figuring out the right measurements of each individual GF flour), I highly recommend this one. I haven’t found it to have much, if any, after taste, nor does it seem to weigh down the baked goods as much as other blends I’ve tried have done in the past. So, that is the flour blend I used for this recipe. You’re welcome to try using a different one, but do so with a bit of caution, as not all blends react in the same way, so it can be harder to know if they’d come out right or not. 🙂

GF, Blueberry Scones/w Almond Glaze-

Dry Ingredients-

  • 2 C.  Gluten-Free, Cup-for-Cup Flour Blend (I used Measure for Measure blend from King Arthur Flour)
  • 1/2 Tsp. Salt
  • 1 Tb. Baking Powder
  • 1/3 C. White Sugar

Wet Ingredients-

  • 1/2 C. Cold or frozen, Butter, cut into chunks, or shredded (I used Earth Balance)
  • 1 Egg
  • 1/3 C. Milk of choice, plus some for brushing (You can used dairy-free milk, just add about a tablespoon more butter, to balance out the fat)
  • 1 Tsp. Vanilla Extract
  • 1 C. Blueberries, frozen

Glaze Ingredients-

  • 1/2 C. Powdered Sugar
  • 1/2 Tsp. Almond Extract
  • 1/2 Tsp. Vanilla Extract
  • 1 Tb. Milk of Choice

Directions-

Preheat oven to 400°, and line baking pan with parchment paper, or silicone mat.

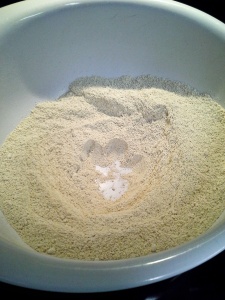
In a large bowl, whisk together all the dry ingredients, until well combined.

In a food processor or using a fork (I recommend using shredded butter for the latter), mix with dry ingredients, until it resembles, course meal.

Add the egg, milk, and vanilla, mix with a wooden spoon until combined (this took a bit of time)

Gently fold in the blueberries.

Transfer dough to prepared pan, press into about an 8″ disk, and cut with sharp knife or pizza cutter, into 7-8 pieces.

Gently separate pieces on your pan, and brush each with milk.

Bake for 12-18 minutes, or until lightly browned.

Once they’ve cooled for about 5-10 minutes, using a fork drizzle glaze all over each one.

For the Glaze-

In a small bowl, beat together all ingredients, until smooth.

Makes: 7-8 Scones
Posted in Gluten Free, Vegan, Vegetarian

Vegan Peanut Butter Cup “Milkshake”

eganIn my opinion, there’s nothing like sipping on a milkshake on a warm spring day, sitting on a porch, ignoring the world.

Although, that opportunity doesn’t happen very often. So, I tend to settle for making one up for on the go, or sipping it at the end of the day as a meal replacement. It may not be the healthiest choice for dinner, but it’s a delicious one. And there are some days, where you need to have a delicious ending, because, let’s be real, the in-between part of the day can really suck.

IMG_0721 Edited

One of my favorite milkshakes, is peanut butter cup. The rich peanut butter flavor with the creamy, cool frothiness of the milkshake, seem to just belong together. And let’s not forget the subtle chocolate flavor in the background to compliment and send it over the top.  Ahh, it’s just the best. Haha

IMG_0720 Edited

After I went vegan, I didn’t want to give up one of my simple pleasures, so ever since then, I’ve been perfecting my milkshake recipe, to make it as thick and as creamy as the original. I finally found a point in my tweaking, where it’s just like the ones I used to have.

All you need is a few ingredients and a blender, then we’ll be off!

Peanut Butter Cup “Milkshake”-

Ingredients-

  • 1/2 a large Banana (or 1 Sm. Banana)
  • 1/4 C. Peanut Butter
  • 1 Scoop (23 g.) Vegan Chocolate Protein Power (I like Orgain’s Creamy chocolate fudge)
  • 3/4 C. Your Choice of Milk (I like Almond, but Coconut or Soy should both work as well)
  • Handful of Ice Cubes (about 5-6 cubes)

Directions-

Place all ingredients in blender, in order as stated above. Blend until just smooth. Serve immediately.

Makes: 2, 6 oz. servings.
Posted in Gluten Free, Vegan, Vegetarian

Crazy (Pop)Corn

This popcorn is made in coconut oil, salted, then tossed in caramelized coconut, and drizzled with chocolate. ❤

IMG_0482 Edited

Recently, my brother and I have been watching the show, Series of Unfortunate Events. We find it to be hilarious. There’s something about watching someone else have a terrible life, with absolutely no luck at all, that makes you feel so much better about your own life, you know? Haha 😉

In my opinion, this is the perfect snack for winding down on the couch, with a good series to binge watch (like, Series of Unfortunate Events), or with a good movie to watch.

IMG_0494 Edited

This popcorn is a mixture of salty and sweet. My goal was to make it similar to that chocolate drizzled popcorn you can buy at the store, that costs an arm and a leg, but tastes so divine! I mean, what’s not to love? You get that salty, slightly crisp popcorn, with pops of chocolate that just melts in your mouth. The ultimate snack. ❤

As I was putting all my ingredients together, I looked over to the other side of the kitchen, and saw these coconut chips (their not crisp like potato chips, their more like, large coconut flakes), then an idea hit me. What if I take some of the coconut, toast them, and then slightly cook them with agave nectar?

So, that’s exactly what I did. The result? Chewy caramelly coconut perfection.  It just the extra boost that the popcorn needed!

IMG_0512 Edited

Don’t be too intimidated by the amount of different components, it’s all made in one pot, and is thrown together pretty fast, after the popcorn is made. 😀

You can easily double the recipe, just use a larger pot when making the popcorn. I also recommend having all your ingredients pre-measured before you get started.  It lasts 1-2 days, stored in an airtight container.

Crazy Corn-

For the Popcorn-

  • 1/3 C. GF Popcorn Kernels (I used sprouted, I love the flavor it has, but you can just use whatever your favorite kernel is)
  • 2 Tb. Coconut Oil
  • Salt, to taste

For the Coconut-

  • 1/3 C. Unsweetened Coconut Chips (You can buy these either untoasted or toasted. If you use the former, just skip the toasting step.)
  • 2 tsp. Agave Nectar
  • Few Dashes, Salt

For the Chocolate Drizzle-

  • 1/4-1/3 C. Vegan Chocolate Chips (I really like Enjoy Life brand)
  • About 3 tsp. Non-dairy Milk (I used Almond)

Directions-

In a medium or large pot (you want to be able to have all your kernels in a single layers, if there’s doubling, some either won’t pop, or they’ll burn.) Melt coconut oil at med.-high heat. Once it’s all melted and is evenly distributed around the bottom of the pot, drop two kernels in, and cover with lid, leaving it ever so slightly ajar (if you have an air-hole in your lid, you can skip that part). Once the two kernels have both popped, pour the rest of your kernels in, using movement with your pot to even all the kernels out. Cover with lid slightly ajar again, and turn off the burner, or put it on low. Once the kernels are popped, toss in salt.

In the same pot, immediately place coconut, on medium heat. Stirring around a bit, until lightly browned. Stir in agave nectar. Let cook for just a minute or two. Dash with salt. Turn off heat, then carefully (the coconut mixture will be very hot) toss in popcorn.

In the same pot, immediately place chocolate chips. They should melt with just the heat of the pot, so there’s no need to turn on your burner. Stir constantly, until just melted. Add milk, a little at a time. You want it to be smooth enough to drizzle, but be careful not to add too much, or else it won’t harden around your popcorn as it cools, making it pretty hard to eat.

Drizzle half the melted chocolate with a fork, over the top of the popcorn. Using a wooden spoon, very gently flip once or twice, then drizzle the rest of the chocolate on top.

You can eat immediately, but I would recommend waiting about 20 minutes, for the chocolate to melt, for easier consumption. 🙂

Serves: 2-3 people


Posted in Gluten Free, Vegan, Vegetarian

Vegan Peppermint Mocha

One of my favorite drinks to get at Starbucks is that seasonal treat they come out with every year. The peppermint mocha. To me, as cheesy as it may sound, it’s Christmas in a cup. Perhaps that makes me “basic”, but you know what, if I am, then I am proud of it! 😀

img_0164-edited-2

However, I’ve always found the prices there to be expensive, and they seem to constantly be rising! Around this time of year, I especially don’t want to spend over $4 for a cup of coffee, as I’m already spending quite a bit of money on gifts.

img_0159-edited

So, I set out to make my own peppermint mocha, so I (and you) could save money, and also have it whenever (like when I’m lounging in my sweatpants). 😉

So, without a further ado, brew your coffee, grab your favorite Christmas mug, and let’s get started!

Vegan Peppermint Mocha:

Ingredients-

  • 3/4 C. Almond Milk
  • 1 C. Strong Hot Coffee
  • 1 Tb. Cocoa Powder (or a vegan how cocoa mix + omitting agave nectar)
  • 2 Tb. Agave Nectar
  • 1/8-1/4 Tsp.Peppermint Extract (depending on how strong you like your peppermint. If you like strong peppermint up your amount to 1/4 tsp.) 

Directions-

In a small bowl heat almond milk in microwave (about 2 minutes). Then whisk in cocoa, agave, and peppermint. 

If you have a milk frother, you can go ahead and briefly foam it up a bit. Set aside.

Using either one larger mug, or two smaller ones, pour hot coffee.

Pour milk mixture evenly on top of the coffee. 

Serve immediately. 

Makes: 1 Large mug full, or two normal/small mugs full
Posted in Gluten Free

Peppermint Twists

Christmastime is here! And, with that winter is just around the corner, or as I (and many others) like to call it, minter!!! Minter is here ya’ll!!!! 😀

As you probably already figured out, I’m a big fan of mint. But, more specifically, I’m a big fan of peppermint. It’s one of those flavors that ushers me into the Christmas spirit, and makes me want to sing “falalalala-lalala” at the top of my lungs..like a crazy person… 😉

img_0108-edited

Now, I don’t know about you, but when I think about Christmas, I think about certain traditions, and memories. Like decorating a magnificent green tree that smells out-of-this-world amazing. Or sitting by the fire, with wrapping paper still covering the floor from opening presents earlier in the day, sipping my mama’s hot cocoa, just listening to my family talk and laugh. And, I think about the constant making of Christmas cookies, and how great the house smells during that time.

img_0100-edited-frosty

So, with that in mind, I thought I’d stay true to my name, and pass on a gluten-free Christmas cookie recipe, that I’ve been working on for a while.

I hope you get to share these with loved ones, and some amazing hot cocoa. ❤

Gluten-Free Peppermint Twists-

Wet Ingredients-

  • 1 C. Butter, at room temperature
  • 1 Egg
  • 1 Tsp. Vanilla Extract
  • 1 Tsp. Peppermint Extract
  • Approx. 1 tsp. Red Food Dye (if your out, you can try about 1/2 tsp. pink dye, and a heaping 1/2 tsp. black, you’ll have a retro red color.)

Dry Ingredients-

  • 1 C. Powdered Sugar
  • 2 C.  GF, Oat Flour
  • 1 C. Brown Rice Flour (I used Bob’s Redmill brand)
  • 1/4 C. Cornstarch
  • 1 Tsp. Baking Soda 
  • 1/2 Tsp. Salt

Directions-

In a large bowl, cream butter. Then beat in the egg until light and fluffy. mix in powdered sugar, as well as both the vanilla and peppermint extract. 

In a medium bowl, mix together the rest of the dry ingredients, until you don’t see many lumps. 

Slowly stir in half the flour mixture to the wet. Once just combined, mix in the other half of flour mixture. 

Split dough in half, being careful to get exactly half (I recommend weighing each round of dough). 

Roll one of the halves in to a big ball, then flatten a little bit, and wrap in plastic wrap. Refrigerate.

In a medium bowl (I used the one that was previously my flour bowl),with the other half of dough, mix in red food dye, keeping in mind that the color of your dough will be just slightly less vibrant when baked. Start of with about a teaspoon of dye, and go by eye from there. 

Take your round ball of dough, roll it, flatten it, then wrap it in plastic wrap, and refrigerate the dough over night. 

On a lightly floured (using oat flour) surface, weigh out 13 pieces of dough per color, to about 1 oz. each. You should end up having 26 pieces of dough total. I would recommend keeping the pieces you’re not working on in the fridge, as it’s easier to work with when it’s chilled. 

Take one piece of the none colored, and roll it into a little snake, then take a red colored one, and do the same, trying to keep it the same size as the previous. Then, take one end of each and gently press a small section together, and proceed to twist on color over the other. Being careful as too much twisting and it’ll break. 

Place on a parchment lined cookie sheet (the cookies should be about an inch apart). And repeat with the rest of dough. 

Place cookie sheets in the fridge for about 15 minutes. 

Preheat oven to 350°. Bake cookies on the middle rack for about 15-18 minutes. The bottom should be light brown. 

Let cool on cookie sheets, and enjoy! 😀

Makes: A Bakers Dozen (13 cookies)
Posted in Gluten Free, Vegan, Vegetarian

Chocolate Pudding

Chocolate. It’s the hot comfort on a cold night. It’s the emotional wreck’s best friend. It can be sweet. It can be bitter. It’s the cold joy on a hot summers day. It’s happiness for the taste-buds, and I love it! 😀

I remember as a kid absolutely loving those pudding cups you can get at the store, you know the ones. They were always silky smooth, and sweet. And had a cooling sensation as it slip down your throat with ease. It was always a cause of excitement in my house, since my parents rarely bought them. My mama had a liking for using the word “healthy”, and I had no idea what the definition was, except it usually meant I was going to be snacking on that carrot stick instead of that amazing looking cookie, or in this case, pudding cup.

20161107_154516-edited-2

As I got older, I began to understand what healthy meant, but my love for pudding never changed. I still have the ability to put away 5 little packages of pudding with no help from anyone else. That is where my inspiration for this recipe came from.

Pudding is not a filling food, that’s just a given for most people. But, I, in order not to gain 85 Ib. this year, thought perhaps I could make an equally delicious pudding, that was a little more filling, so that the needing to eat so much pudding could be crossed out.

20161107_154238-2-edited-2

Enter protein powder. I was hoping that by using extra protein it should do the trick, however I was nervous about the taste of protein powder would take over, as it seems to have a knack at doing so. After a little trial and error, I was finally able to make one that has 5 grams of protein per serving, compared to the 1 gram, that the prepackaged one has. Not a lot more, but it was enough to satisfy me, as I hope it does for you as well.

It’s a simple recipe, and I was thankfully able to figure out my way to make it vegan, while keeping the creaminess intact! 🙂

Chocolate Pudding-

Ingredients:

  • 2 C. + 3 Tb. Almond/or Coconut Milk
  • 2 Scp./approx. 46 g. Vegan Chocolate Protein Powder (I used Orgain’s Creamy Chocolate Fudge)
  • 3 Tb. Cornstarch
  • 1 Tb. Cocoa Powder
  • 1/3 C Stevia/ or Liquid Sweetener (e.g. agave, or honey if not making it vegan)
  • 1 tsp. Vanilla Extract

Directions-

In a saucepan whisk together 2 cups milk and protein powder on med-low heat, stirring occasionally.

In a small bowl mix together cornstarch, 3 Tb milk, and cocoa powder (this helps ensure your pudding to be smooth).

Once your protein milk is hot, add vanilla extract, sweetener and cornstarch mixture. Slowly whisk on low heat, for about 10 minutes, until you can see it’s thickened and has come to a slow boil . Keeping in mind that it will thicken a little bit as it cools, but not a lot.

Take off heat. Eat warm, or store covered, in fridge for up to 3 days.

Makes: 4, 1/2 cup servings.
Posted in Gluten Free, Vegan, Vegetarian

Pumpkin Chocolate Chip Cookies

One of my favorite things, in the whole wide world is pumpkin.  No, seriously. I love it so much that you could even ask someone I’ve only had a couple of conversations with, and they could tell you, pumpkin would be on my list of favorite things. It’s almost embarrassing. 😉

I remember the first time I  bit into a pumpkin chocolate chip cookie, I was around the age of 13, and my older sister was making them. From the first moment I tasted it, I knew…it was true love. I then proceeded to eat every last one in that cookie jar! And let me tell you, I still have no regrets about that decision.*cue smirking*

20161012_164117

These are not all that unlike the ones I had that day. The difference you ask? Well, I’d be glad to tell you. Because of my eating restrictions, and the eating restrictions of the people around me, I wanted to make these work for both me and many of them. So, after some trial and error, I’ve managed to make these both gluten-free and vegan!  Not to mention they’re also very easy to make. 🙂

I hope these bring as much warmth to your table as they did to mine.

Gluten Free, Vegan Pumpkin Chocolate Chip Cookies-              

Dry Ingredients-

  • 3 C. Oat Flour (can easily make this at home, with your choice of unflavored, GF oats+ a food processor, or blender)
  • 1 tsp. Baking Soda
  • 2 tsp. Baking Powder
  • 1 tsp. Salt
  • 2 1/2 tsp. Pumpkin Pie Spice (or 2 tsp cinnamon, 1/2 tsp nutmeg, dash of cloves, and a dash of allspice)
  • 1 C. White Sugar
  • 1/2 C. Dark Brown Sugar (can use agave instead, just add with wet ingredients +increase cooking time by 5-10 min. It will make them bigger, but less fluffy)

Wet Ingredients-

  • 1 Tb. Cornstarch, mixed with 3 Tb. Water
  • 1 C. Pumpkin Puree
  • 1/2 C. Vegetable Oil
  • 1/4 C. Vanilla Almond Milk
  • 2 tsp. Vanilla Extract
  • 1 C. Vegan Chocolate Chips

Directions-

Preheat oven to 350°, and line cookie sheets with parchment paper.

In a large bowl mix together all the dry ingredients, then create a well in the middle, like so.

oat-flour

Place all the wet ingredients, except the chocolate chips in the ‘well’, and mix with wooden spoon until just blended. Then gently fold in Chocolate Chips.

Scoop heaping tablespoon fulls of dough on prepared sheets, and bake for about 20-25 minutes.

Let cool on sheet for a couple of minutes, before moving to a cookie sheet to cool fully.

Makes: 2 Dozen Cookies